Building Cost Effective Garden Arches

Lately I have been spending more time at home, as most of us are (#covid19). I’m thankful to have a job, and able to work from home, but being inside all day working means I count down the hours and minutes until I can breathe some fresh air outside.

I’ve rekindled my enjoyment of gardening, and thankful also that this situation arose in spring, and NOT summer. 

Unfinished planter beds that I started last summer have now been assembled, placed, leveled into the ground (a difficult and tedious task) and filled with soil (delivered to my home from https://www.bigyellowbag.com/ which I found out about from my friend over at http://mygardeningstyle.com/ )

Another thing I have been doing is watching gardening youtubers, reading my library of gardening books, and sorting through my box of seed packets (thanks mom for some of these over time).  I have since re-organized my seeds in a 4″ notebook with clear zipper organizers and a label maker, which I’ll do another post about later possibly.

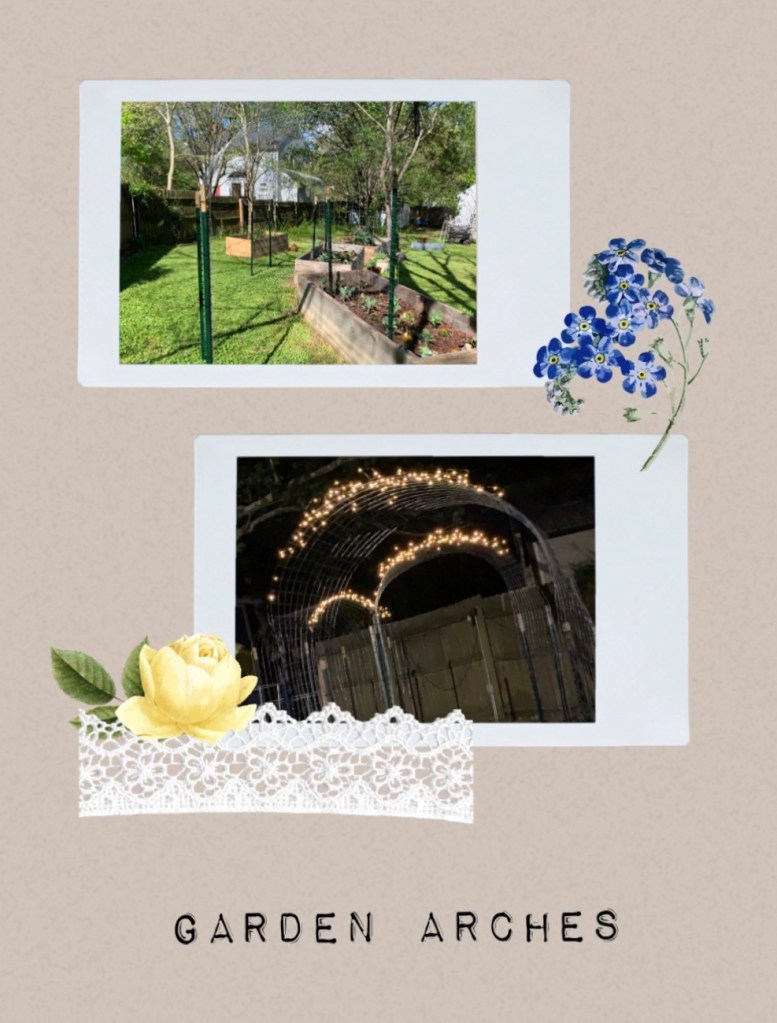
I’ve always wanted arches with climbing flowers/plants on them, but the ones at the stores are usually fairly expensive, and not a custom size. Thanks to YouTube sending me similar videos of things I like, I found a few on cost effective garden arches using T-posts and cattle panels or other similar type materials. I have since made 6 between my front and back yard in different sizes and wanted to share my leanings with the types of materials I used.

Materials Used (approx rounded costs):

MaterialsNotesPicture
4 six foot T-Posts per arch4 foot aka 72 inch for less than $5 a piece – the shorter and longer ones cost more
4 foot Steel Welded Wire (fencing material)I got the 100 foot roll for ~$77 because I knew I wanted to make about 5 archesThis image has an empty alt attribute; its file name is img_1678.jpg
1 Fence Post Driver~$37 well worth the cost! I almost didn’t get it but my husband said they really make the jobThis image has an empty alt attribute; its file name is img_1679.jpg
Zip TiesI started with a 100 pack, but recommend the 1000 for ~$20This image has an empty alt attribute; its file name is img_1680.jpg
Wire CuttersI already had these, but a heavy duty one seems to be between $10 and $20

I didn’t know how much spacing and how long to cut the fencing material, and originally tried one t-post per side, and found two per side was more sturdy. If I had known a few of this information ahead of time, I could have probably gotten 7 to 8 arches out of the 100 foot fencing material. Even so, each arch costs around or less than $40 give or take, and not considering sales tax. Do a search on garden arbors or arches, and the flimsy ones are $181+, sturdier ones are $300+!

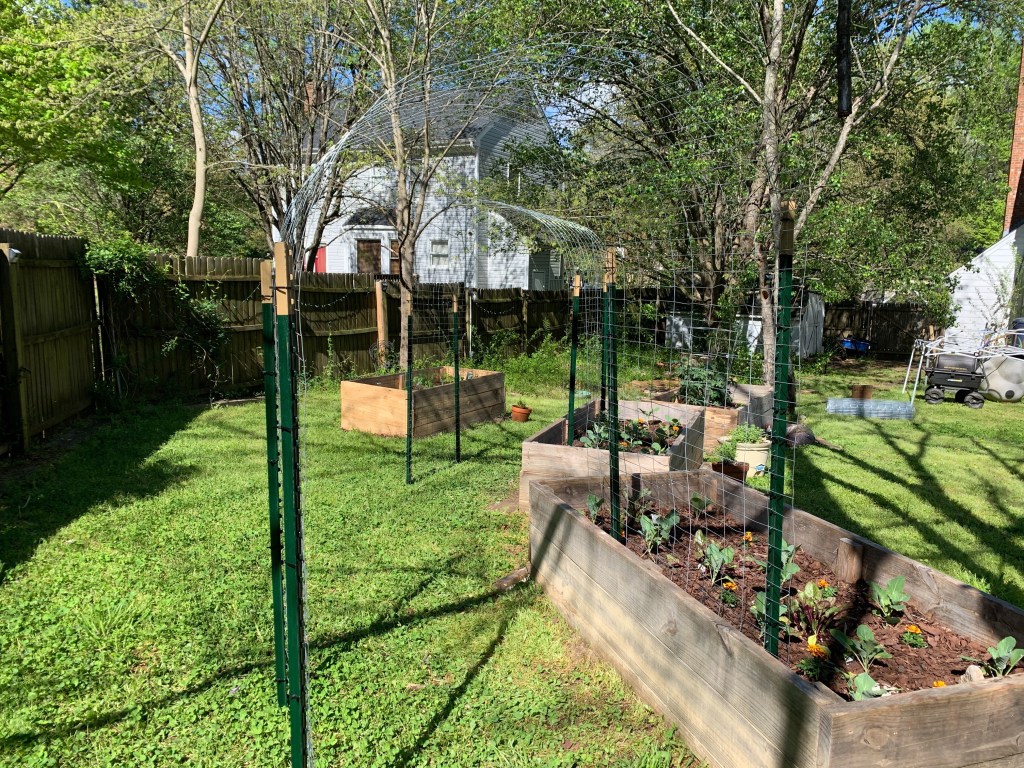
I won’t go into the trial and error of how I measured out the lengths, but I will say that when cutting your fencing (roll it out in the yard, with a heavy board or something on one end). I have found that 15 feet length makes a great about 4 foot wide arch, with between 6.5 to 7 feet high with plenty of walking space underneath. I could have possibly saved a foot or two if you don’t install the fencing right at the bottom of the post in the ground, and a foot or two higher off the ground, since plants that climb won’t be able to reach it until they have grown a bit – but I feel like the fencing on the ground means it’s a bit sturdier resting on the ground instead of floating on the weight of the zip ties. I did make one 6′ wide arch in the entrance way to the garden, but that width doesn’t seem as sturdy being wider apart and I wouldn’t recommend going any wider than that or the middle might bend and cave in.

6 to 7 inch spacing inside the flower bed

The T- posts I have installed in my flower beds on one side, with about 6 inches on the inside of the bed frame, primarily to plant the vining plants and keep them away from the other plants, and also giving the possibility of having a climbing plant on either side depending on if it likes shade or not. I have decided to make smaller bed for the other sides, so that I’m not dealing with grass growing on the side not in a flower bed. I’ll write another post on how I made the smaller beds for the other side of the arch.

In order to space between posts, I measure between the Vertical lines I want my posts to line up with. Two rectangle sections on each side seems to be about right for me. The first one I didn’t measure and I had to adjust the second post. Otherwise the fencing doesn’t have anything to be attached to. Another tip. Don’t drive the posts all the way in before measuring twice 😉.

Depth wise depends on the soil, if it’s in a bed, and aesthetic, but I like to use painters tape to mark the depth I’m thinking of going to from the anchor counting up the notches. Once it’s in the ground I don’t know if it’s gone in 1 notch or 5, so it’s a good marker.

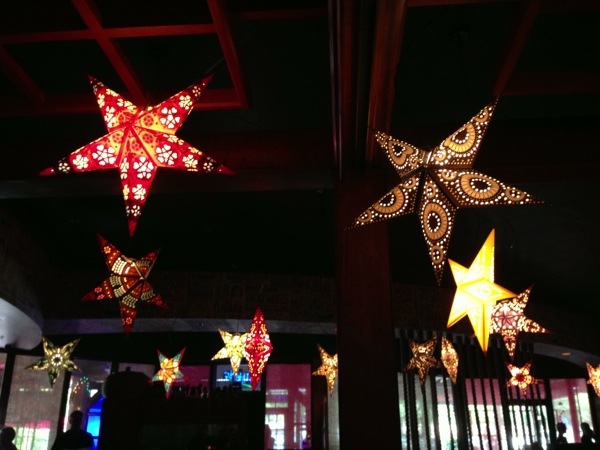
I’m a big fan of mood lighting and twinkly lights, so I got some solar wire lights and added them to the tops of my arches. It took a bit of waiting to see which way they should face for the most effective sun exposure, but they light up and actually last until about 1 or 2 A.M.

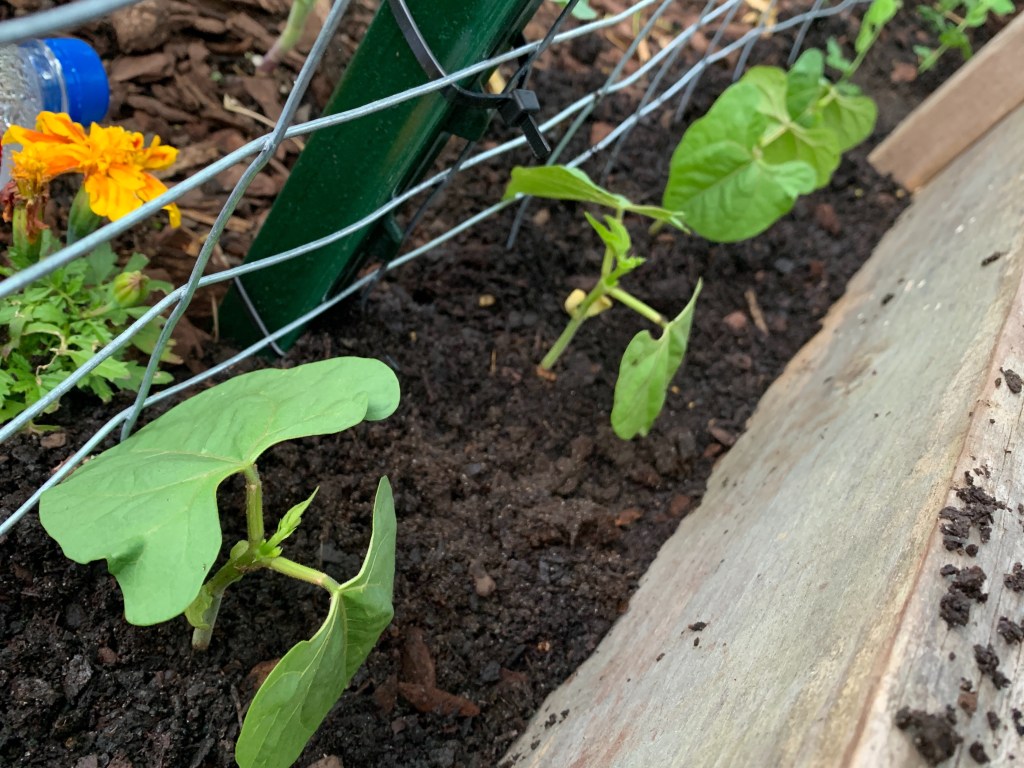
This is the first year I will be growing vines on these, so I will have to post an update on the sturdiness once more plants are on these. Things like peas and beans I don’t foresee any issues, but heavier things like melons at the top may create a bend if they managed to get to the very top, but I don’t think there will be an issue on the sides …. especially with two posts on either side. If for some reason these don’t hold up over time, the t-posts will, and I would replace the arches with heavier duty cattle panels (at 4 foot by 16 foot). A little more expensive, around $20 per panel, and harder to transport home. Plus in the current conditions, delivery was not an option or not available at my local hardware store.

One thing I’d like to do is spray paint the t-posts. None of the pick up stores had the option to pick up spray paint and I wanted to get my arches installed, but I might paint them later. It’s easy enough to cut the zip ties to take the fencing down or i could paint the arch too. It will be covered in vegetation at some point 😉

Anyway, if I think of any other tips I’ll add them, but hopefully this helps if you want to build some arches for your climbing plants in your garden!

How to Remove a Contact from Linkedin

It took me a bit of searching on youtube and the internet for a recent layout of linked in an how to remove a contact.  As of 3/28/2014, this is where I found the option:

  1. go to http://www.linkedin.com (sign in)
  2. at the top row go to: network > contacts Image
  3. at the page with a listing of all contacts, the easiest way is to hover over a contact where ‘tag message more’ options show up > select more > Remove connection Image

From the forums I have read, the user you remove gets a message that you have removed them.  I haven’t tested it out but I am assuming you wouldn’t care if you don’t know them 🙂

Hamburger Cupcake!

I was craving a cupcake (when am I not? haha) and Gary picked out this cute cupcake that looked like it had a hamburger on the top – which was really two cookies in between a boat load of icing.  I ate the cupcake part and the cookies.  Hopefully I am not up with a sugar rush tonight ;P

20140307-213324.jpg

Gary’s First Triathlon Sprint!

Today, Gary has his first triathlon sprint. A 250 yard swim, 12.5 mile bike, and 2 mile run in under 2 hours!

20131013-215726.jpg

We got to see him before the event started. When his turn came up, he did the swim . . .

20131013-215941.jpg

then ran over to the bike where he put his running belt on with his number, toweled off, put his gloves, helmet, and glasses on . . .

20131013-220211.jpg

. . . got back, mounted his bike, took off the gloves, helmet, and glasses, and then did the running leg of the race.

20131013-220333.jpg

It was exciting to watch. I’m hoping the event photographers got the swimming section since spectators weren’t allowed in there due to the small space. I’ll post photos if there are any.

Gary is looking forward to his next race!

4th of July Weekend House Projects

20130709-124852.jpg

The 4th of July weekend started off with an 8.4 mile hike with a few more friends that were also off for the 4th. We hiked the same trail Gary and I hiked on his birthday, but there were a lot more fungus varieties this time, and no turtles spotted.

20130709-143439.jpg

That afternoon, Gary and I started on the weekend long list of house projects. Mounting the remaining counter top piece, grouting the countertop, installing the new microwave, prepping for tile backsplashes and prepping for painting.

On Friday we installed the tile back splashes (the Green things are just the spacers:

20130709-144630.jpg
The next day we got to remove the spacers!

20130709-144642.jpg

On Saturday we painted.

First, Gary had to finish installing some of the crown molding in a section that was added , and then we had to sand and apply two coats of paint on the previously existing stained crown molding, doors, and door frames.

20130709-160529.jpg

Then (after prepping which I do NOT like; sanding, wall washing, etc) The kitchen and the bathroom/washroom were finally started.

Two coats of paint for the kitchen, one coat of thick primer and two coats of paint for the bathroom since it was a darker blue.

The kitchen went from a pink to a yellow (and while I still kind of miss the pink even though it wasn’t the shade I was expecting when it was on the walls), I do like the cheery bright yellow.

20130709-160538.jpg

The bathroom/laundry room went from a dark blue to a sandy colour, which you really can’t tell from the pictures. It looks too pink with the light in the picture, and the other picture I did not post makes it look too white. But picture a sandy beach shade 🙂

20130709-160545.jpg

Sunday we had to finish the second coats of paint because the prep work took so much longer than expected.

Then we started on the floor. We had to get and install the backer board and get the tile, etc. Gary cut the pieces, while I got to use the screw gun. My hands are still sore -lol. More prep work I didnt like, such as vacuuming and washing the old yucky floor.

20130709-160553.jpg

After that was installed, we started working on actually installing the tile. The grouting putty stuff looks like frosting, so Gary and I used the terminology of butter-creaming the floors.  Gary left me this message after taking measurements and going outside to cut the tile piece so I saw it when it was my turn to butter cream 🙂

20130717-132957.jpg

We finished half of the kitchen tiling on Sunday . . . on Monday evening after work, we  finished the rest of the kitchen and into the hall and bathroom/washroom.

20130717-133006.jpg
Tuesday evening after work, we grout the tile

24 Mile Cycle!

Gary and I rode on a local greenway near us, and planned on riding for an hour and then and hour back. It was such an awesome ride, and had really pretty scenery. We ended up riding for the full two hours, and went 24 miles! Granted, a lot of it was flat, but there were some hills, and 24 miles is a long way for us beginners. The average speed was about 10.5 mph, and the max speed was 22.5.

Some of the areas that slowed us down in the beginning were the bumpy bridges, and I had to get used to the poles in the middle of the bridges (the kind that prevent cars or golf carts from going on those paths).

I was going to get a picture of the two of us with our helmets and glasses on, but we were mostly just riding and hydrating.

tifosi slip
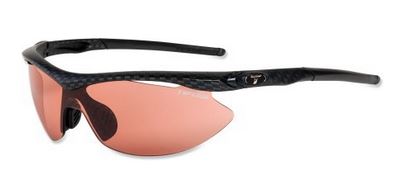
I got to wear my cycling glasses too! There are sun glasses you can remove the lenses from (clear lenses for evening riding, polarized for day time), but the ones I have are basically like transition lenses, and I like that I don’t have to keep up with two sets of lenses. These are made for cycling, and I noticed they have more of a grip on them so they don’t fall off as easily (Tifosi Slip Photochromic Sunglasses).

We then dropped off my bike to get a tune up, and then went home and showered.


Birthday Hike and Dinner!

20130701-171617.jpg

Today, Gary and I went on a birthday hike.  When I texted a friend of mine this, she said “how’s that different from a regular hike?” (since we’ve been hiking basically every weekend).
I said “because there is cake at the end? -haha”

Anyway, it was just Gary and I on an 8.26 mile hike.  I was leading , and saw about 4 different turtles on the trail!  I guess because of all the rain we had, but we usually don’t see any.  There were a lot of orange mushrooms on this trail too.  There was one HUGE log with big orange mushrooms that almost looked like someone threw pumpkins down the hill.  It was on the way back, and if I hadn’t been so hot and humid and tired,I might have gone down and taken a picture.  But I was too tired and didn’t care at that point -lol

After getting back and showering at the house, we ran errands until it was time for Gary’s birthday dinner get together with some friends at a really great mexican restaurant.  I had gotten some mini individual sponge cakes and cut up strawberries and those were the birthday cakes.  Light, healthy, and super yummy 🙂

20130701-171625.jpg

Sci-Fi Symphony

20130701-171331.jpgA friend of ours invited us to go to the symphony with her for sci-fi music and guest appearance with George Takei (most widely known for being Sulu on Star Trek). Music scores from E.T., Star Wars, Star Trek, and other sci fi movies.

Before the symphony started, there was a darth vader, storm troopers, chewbacca and c3po and r2 in the lobby for people to get their pictures with.

One neat story George Takei told, was how his characters name of Sulu came about. Gene Roddenberry didn’t want to pick a name that was a particular asian race (Korean, Japanese, Chinese) , so he was looking at a map, and there was a sea in asia called the Sulu Sea. So basically his character represents asia in general, not a particular race within asia.

At the end of the evening, the guest conductor conducted the last piece (star wars awards ceremony score) with a mini light saber which was cute.

8 Mile Cycle #2

20130701-165002.jpg

June 7th Gary and I got hybrid bikes so we could start cycling. I found a really nice bike at Play it Again Sports with upgraded Shimano breaks.

There were no pre-owned bikes for men, so we got Gary’s at Dicks Sporting Goods. Helmets, tyre pump, lights for the bikes and phone cases, tools, oil, etc. (from REI). Bike rack from Performance Bike.

We got the equipment and practiced riding around the neighbourhood, but actually did an 8 mile cycle on June 24th, and then the same route today (the 27th). We beat our previous time by a few minutes, and only had to walk up 2 hills, versus 4 last time. Definitely getting better.

Our goal is to do some cycling tours and trips, possibly some offered by REI. I want to join a casual cycling group, and possibly do a race of some sort at some point. So far I really like it 🙂